Sunday, December 9, 2012
Crochet Cowl
I saw this on Pintrest and had to try it. I used a 42 chain to start. A single stitch for most of it but randomly added a row of a double stitch at every other stitch. It only took about 5 hours to complete and the outcome looks GREAT!!
Saturday, October 20, 2012
Tuesday, September 25, 2012
A Spot for Bill
Anthony recently caught a big bass that he is getting mounted but of course it will take up to 10 months to be complete, so in the mean time to save a spot in the wall for "Bill" I made a bass silhouette. I drew I onto white paper, cut it out and taped it on a piece of black paper put it in frame for a finished look and there you have it a spot for Bill. Simple, easy and he loved it!
Pour me a Corona
These are a little frustrating but the outcome is great and they are so simple to make. Who would have known that a little acetone soaked yarn wrapped around a bottle lit on fire then submerged in ice water would easily and evenly break. They are frustrating because out of three attempts I only had one turn out. I'll just have to drink more Corona so that I can give it another try.
Thursday, July 19, 2012
Saturday, June 30, 2012
Friday, June 8, 2012
Saturday, April 21, 2012
Renew and reuse
I found this set of chairs at the dump and decided to save them. With a quick sanding and a fresh coat of paint that turned out like new. They will certainly get some good use sitting around the camp fire this summer.
Upcycle
I took and afternoon and made a wood pallet bench. It was so simple and easy and only took about an hour to complete. There will definitely be more pallet projects to come.
Thursday, April 5, 2012
Crochet LOVE
Here is my latest crochet blanket! I'm really happy with the outcome. I have finally grasped the end chains and skipping a stitch after the end chain. I should have put a picture of my first attempt. My blanket was tapering and I couldn't figure out why. This one turned out perfect though. It will make a great birthday present for my mother.
Saturday, March 10, 2012
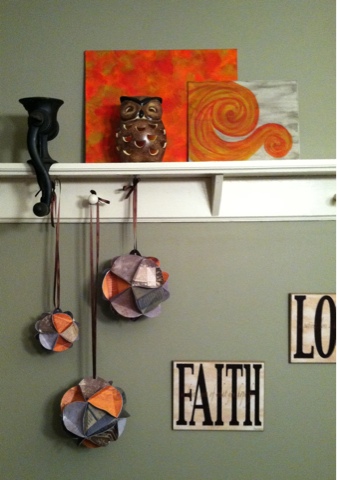
Paper Ornaments
My cousin Amy told me how to make these ornaments. You cut 20 equal size circles out of scrap book paper. Make three folds in the paper to form and equal lateral triangle. Then glued them together to form a globe shape. I think I an going to make some smaller ones into Christmas tree ornaments.
Crochet Blanket
I have FINALLY completed one from start to finish. I am in love with the finished project and the love the steele blue color. I am going tostart another one right away but this time I would like to try stripes.
Thursday, March 8, 2012
Contact Paper Silhouette
I love love love using contact paper for wall decor. It is so versatile and it comes is many different designs and patterns. For this I free handed a deer silhouette on the back of white contact paper. I carefully cut it out. Using a credit card to smooth out the air bubbles, I peeled the backing from the contact paper and smoothed it onto a painted piece of poster board. I was dying to add some lace pattern to it to make it more feminine and classy but after talking with Anthony he loved it so much he wanted it to go in his "man cave" so we opted for no lace.
Sunday, February 26, 2012
T-shirt Scarf
I saw this idea online today. It looked so easy and stylish I had to try it for myself. It takes about 45 minutes from start to finish. I used a white t-shirt but any t-shirt will do. I think using a few different t-shirts would have a really cool effect. I think I am going to make a couple more. I'll post the finished product.
The Writing on the Wall
Wall descals are all the rage right now and they can be quite expensive. So here is an east affordable way to get the same look.
I used contact paper to make these. You can find all different colors and patterns online. I bought this contact paper at Walmart but I know you can find a large variety at any hardware store. I cut the letters with a Cricut but you could also trace the letters and with a steady hand cut them out.
In my prior apartment a cut out a floor to ceiling tree I added leaves and birds to the branches and placed some birds swooping down to the tree. It makes a big bold statement in a room and the possibilities are endless.
Subscribe to:
Posts (Atom)


